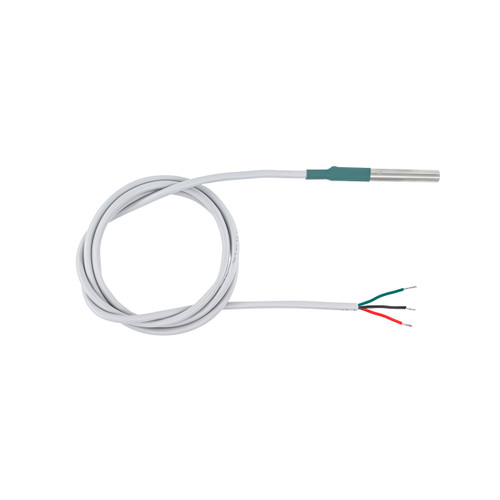
The LM335 Precision Temperature Sensor is a versatile, low-cost solution engineered for accurate thermal measurement in a wide range of electronics applications. Designed for easy integration, it operates as a 2-terminal Zener diode with a breakdown voltage linearly proportional to absolute temperature (Kelvin), making it ideal for digital temperature loggers, environmental monitors, and control systems. With a high degree of accuracy and a wide operational current range from 450µA to 5mA, the LM335 ensures stable performance without the need for calibration or external circuitry.
Unlike thermocouples that demand complex interfacing, or thermistors that require intricate calibration procedures, the LM335 offers a plug-and-play experience with a direct Kelvin output. Its linearity, low dynamic impedance (less than 1 Ohm), and broad sensing range of -40°C to +100°C make it suitable for industrial, automotive, and laboratory-grade applications where precision and dependability are essential.
Key Features
-
Direct Kelvin Calibration: Outputs 10mV per Kelvin, simplifying the conversion to Celsius or Fahrenheit.
-
High Initial Accuracy: ±1°C accuracy at 25°C without external calibration.
-
Wide Operating Current Range: Functions reliably from 450µA to 5mA, providing design flexibility.
-
Low Dynamic Impedance: Less than 1 Ohm ensures minimal voltage variation under changing load conditions.
-
Extended Temperature Sensing Range: Measures from -40°C to +100°C, suitable for both low and moderate thermal applications.
-
No Calibration Required: Provides accurate and linear response out of the box.
-
Interface-Free Design: Unlike thermocouples, no signal conditioning or amplifiers needed.
-
Easy to Implement: 2-terminal configuration simplifies circuit design and PCB layout.
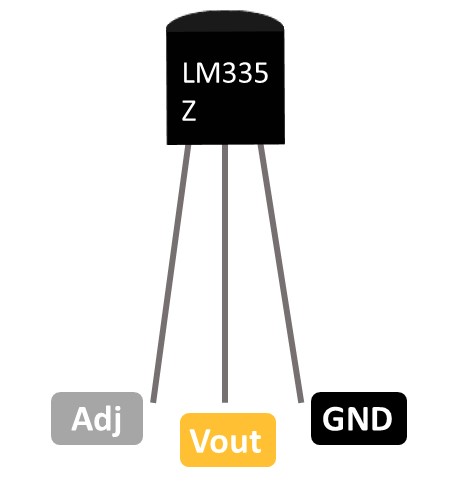
LM335Z Pinout
LM335 Temperature Sensor with Arduino
-
An LM335 sensor
-
A breadboard
-
An arduino board
-
Some jumper wires
-
A 2k resistor
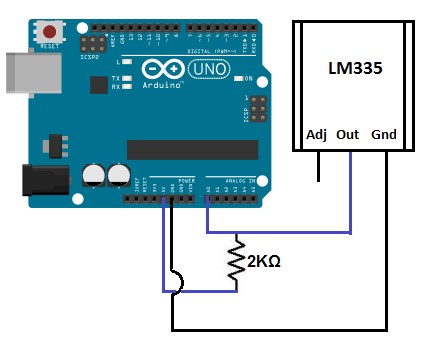
LM335 Wiring with Arduino Connection Diagram
-
Pin 1 is the Adjustable Pin (Adj). This allows us to calibrate the temperature sensor if more precise temperature is required. It is not needed for testing.
-
Pin 2 is the output pin. Attach this pin to analog pin A0 of the arduino board and connect the 2KOhm resistor to the 5V pin of the arduino.
-
Pin 3 is the ground pin and it connects to the ground (GND) terminal of the arduino.
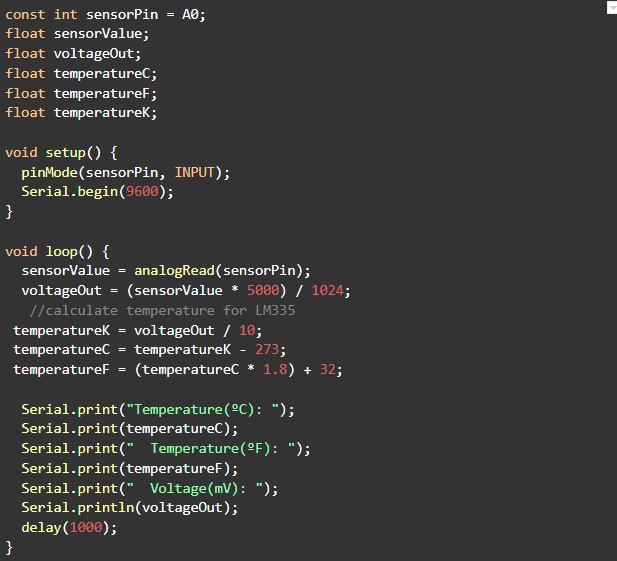
Arduino Code for LM335 Temperature Sensor Circuit
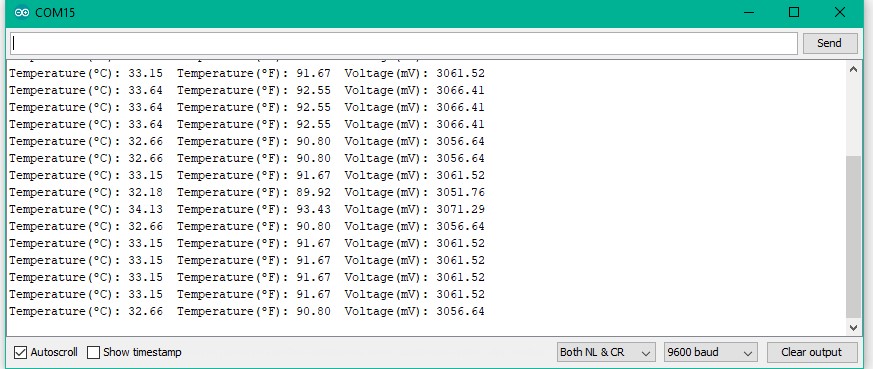
Code Output
- Max Operating Temperature:
- 100 C
- Max Supply Voltage:
- 40 V
- Max Supply Voltage (DC):
- 40 V
- Min Operating Temperature:
- -40 C
- Min Supply Voltage:
- 5 V
- Operating Supply Current:
- 1 mA
- Output Current:
- 450 uA
- Output Type:
- Analog, Analog Voltage
- Probe Length:
- 2 Inch
- Cable Length:
- 1 Meter

